BlueDriver is a leading product in the Bluetooth OBD2 scanner category. It is a popular option amongst mechanics or DYI car owners as a budget-friendly diagnostic code reader.
Read this guide if you’ve also ordered a BlueDriver scanner from Amazon but don’t know how to use it.
If you haven’t purchased this scanner yet, read my in-depth BlueDriver Scanner review on whether this real-time Bluetooth scanner is for you.
This scanner is known for its ease of use, so it does not require additional skills.
In this guide, you’ll learn the step-by-step process of using the BlueDriver OBD2 scanner and how to retrieve diagnostic trouble codes (DTCs) from your ECU.
Table of Contents
How To Connect BlueDriver To iOS (iPhone and iPad)?
You can follow these step-by-step processes to connect your BlueDriver scanner with your iPhone or iPad (the steps are the similar for both devices):
Step #1- Install The BlueDriver App

First of all, turn ON mobile data or connect your iPhone/iPad to a WiFi network. Then open App Store and search “BlueDriver” or open this link in the Safari browser.
Tap on the first search result and verify that developer of the app is Lemur Vehicle Monitors, and then tap on “Get.”
If you have already installed the BlueDriver OBD2 Scan Tool app before, tap on the Download button or Update if any new release is available.
Step #2- Allow Bluetooth Access

Once the BlueDriver app is downloaded on your iPhone/iPad, tap on “Open” to launch the app.
When the app is launched for the first time, you’ll be asked to Buy a new BlueDriver adapter; just tap on “Not Now” to proceed further.
The app will ask your permission to access your Bluetooth device. Provide Bluetooth access by tapping on the “OK” button.
Step #3- Start Your Car Ignition
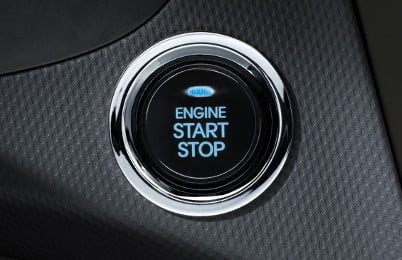
Turn ON your car ignition but don’t start the engine. You can do this by rotating your Car Key in the clockwise direction. If you have a keyless car, just press the Start Engine button once.
Step #4- Plugin BlueDriver Adapter

Locate an OBD2 port of your car and plugin the BlueDriver scan tool adapter. Wait for 5 to 10 seconds until solid blue light goes out.
Note– Your BlueDriver pairing mode will stay for the next 60 seconds, and you’ve to act fast to pair it with your smartphone or tablet.
If you’re unable to pair in this time frame, just unplug the adapter from the OBD2 port and plug it in again.
Step #5- Open Bluetooth Settings

If you have a standard BlueDriver adapter (whose serial number ends with numbers), you can connect manually from the Bluetooth devices.
Go to your iPhone Bluetooth settings and tap on BlueDriver from the device list to connect.
Now, go back to BlueDriver app and start scanning your car DTCs, and read other data.
Step #6- Close BlueDriver App
If you have a BlueDriver adapter whose serial number ends with LE, it only supports in-app pairing mode.
Fully close the BlueDriver app by swiping up and making sure the app is not running in the background.
Step #7- Start Your Ignition
Now start your car ignition but don’t start the engine. Now, plugin the BlueDriver adapter to DLC (Data Link Connector) or OBD2 port.
Step #8- Open BlueDriver App
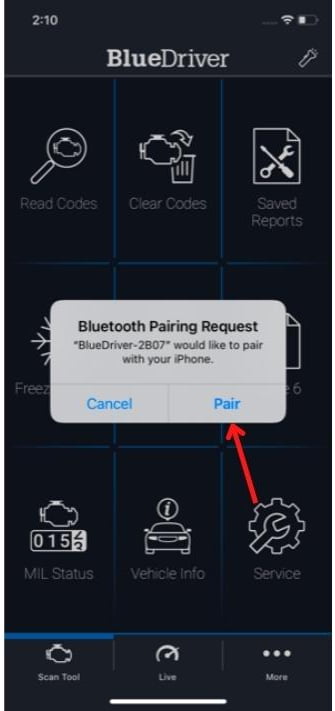
Open the BlueDriver app quickly, and it’ll automatically detect your adapter. Just tap on the “Pair” button to connect your BlueDriver with your iPhone and iPad.
Now your iPhone or iPad is ready to scan your car ECU. Follow on-screen instructions in-app menu to read and clear fault codes.
How To Pair BlueDriver with Android Phone?
BlueDriver is one of the few wireless OBD2 scanners that provide complete vehicle scanning features, including Check Engine, Power Train, Transmission System, Airbags, ABS, etc.
Setting up and pairing your BlueDriver is easy with Android. Follow the step-by-step process explained here.
Step #1: Install BlueDriver App
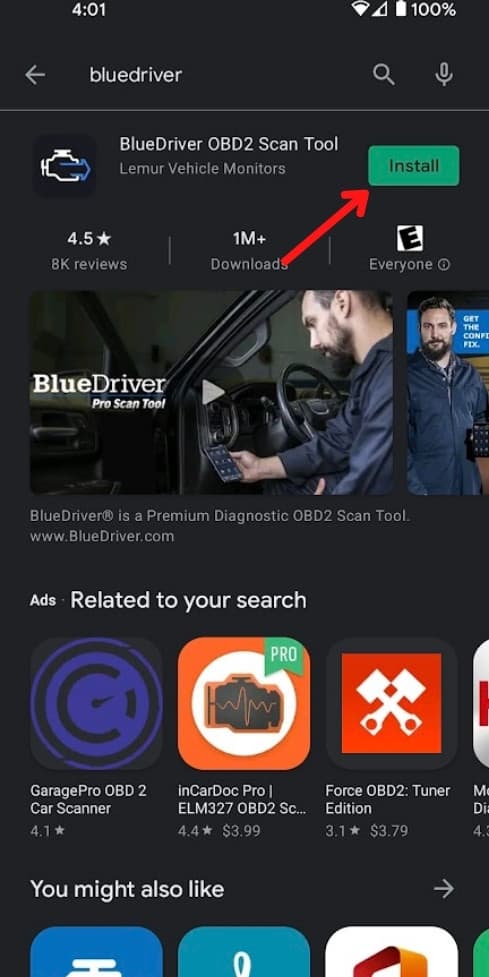
First, go to Google Play Store and download and install the latest version of the BlueDriver app. If you already have installed an older version of the BlueDriver app, update it from Play Store.
Step #2: Allow App Permissions

BlueDriver app will ask to allow motion sensor, Bluetooth settings, Location services, and other device permissions to function properly; make sure you’ve allowed all the permissions. It won’t connect to your phone if you don’t allow it.
Step #3: Enable Bluetooth Settings
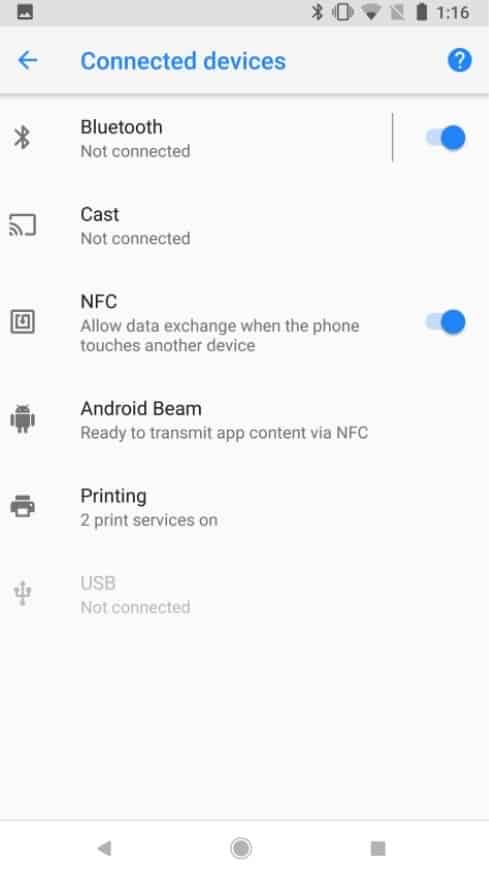
Again, this is cross-checking. If you allow all the apps permissions, it’ll automatically enable the Bluetooth of your device. However, go to device Bluetooth settings and ensure it’s enabled.
Step #4: Turn ON Ignition

Suppose your car is keyless; double press the start button to turn on the ignition.
Do not press the brake paddle; otherwise, your car engine will start. We just have to turn ON the ignition, not the engine.
If your car is not keyless, insert your key in the ignition switch and rotate once in the clockwise direction. Do not start the engine.
Step #5: Insert BlueDriver Sensor

Locate your OBD2 port (generally located underneath the driver’s dashboard) and insert the BlueDriver sensor in it.
Wait for a few seconds until the BlueDriver sensor is ready to connect with your Android smartphone.
Note: Do not insert the BlueDriver sensor if your engine is in motion or ignition is OFF. Otherwise, you’ll face OBD communication failure.
Step #6: Launch BlueDriver App
Go to your smartphone apps menu and open the BlueDriver app. You’ll be asked to Sign In for a BlueDriver account. You can Sign Up for a free account from the Apps menu or this link.
Step #7: Click On Connect
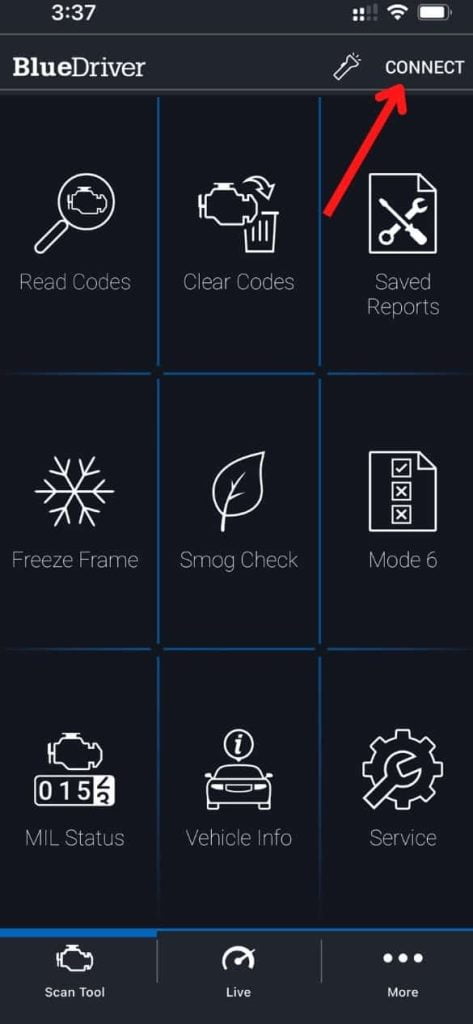
On Android devices, BlueDriver will automatically connect to your phone. However, you can pair it manually from the app interface if it won’t connect automatically.
Tap on the “Connect” option in the app’s top-right corner. You’ll see two options: “Numbers Only” and “LE.”
If your BlueDriver sensor serial number ends with LE, tap on “LE” or “Numbers Only.”
Step #8: Follow On-Screen Instructions

Unplug the sensor from the OBD2 port, and Turn OFF-Turn ON the ignition. Re-insert the OBD2 sensor into the port and tap on “Ready” on your app’s screen.
It’ll start searching for all nearby BlueDriver sensors, and you can connect with your sensor.
How To Use The BlueDriver OBD2 Scan Tool?
If your car’s MIL or Check Engine Light is glowing and you want to find the trouble code, follow these steps to understand how to use the BlueDriver OBD2 scanner:
Step #1: Locate Your OBD Port
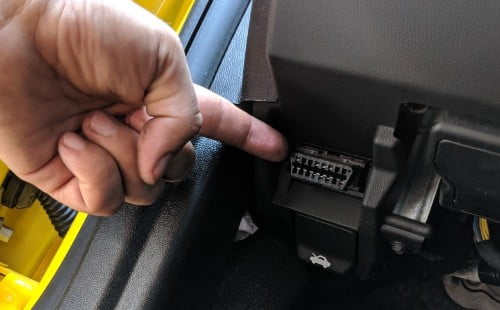
Generally, the OBD port on your car is located underneath the driver’s dashboard. OBD2 port, also called DLC (Data Link Connector), is 16 pins port that connects your OBD2 scanner with the car ECU.
Step #2: Turn ON Ignition

If your car is keyless, press the START button twice without pressing the brake paddle. Do not start the car; turn ON the ignition system.
If your car ignition turns on with a key, then insert the key in the ignition switch and rotate clockwise.
Step #3: Insert BlueDriver Adapter

When your car’s ignition is ON, insert the BlueDriver adapter in the OBD2 port. The blue light will glow if BlueDriver connects to ECU.
Step #4: Open BlueDriver App
If you haven’t downloaded the BlueDriver app on your smartphone or tablet, download it from Google Play Store or Apple App Store.
Open it once you download and install the BlueDriver app on your smartphone. Allow the permissions that it asks for.
Step #5: Pair with BlueDriver

If you’ve allowed all the required permissions the app asks for, it’ll automatically connect with the BlueDriver adapter. Otherwise, go to your smartphone settings and turn ON the Bluetooth.
Exit from the settings menu, turn OFF your car ignition and then turn ON again. Now re-launch the BlueDriver app. It’ll establish the connection, and the Blue light will glow on the scanner.
Note: If you’re facing an issue with connecting your BlueDriver scanner with your smartphone, then follow these steps to fix it:
- Remove the BlueDriver scanner from the OBD2 port.
- Turn ON the ignition of your car but do not start the engine.
- Insert BlueDriver scanner into the OBD2 port.
- Launch BlueDriver App.
- Tap on the “Connect” option in the top-right corner.
- Choose the correct type of BlueDriver and follow the on-screen instructions.
- If your BlueDriver serial number ends with Numbers Only, tap on the Numbers Only option on the app, and if it ends with LE, tap on the LE option.
- Now, tap on Ready.
- It’ll automatically scan all the BlueDrivers sensors nearby.
- Connect with your BlueDriver sensor.
Step #6: Read Codes
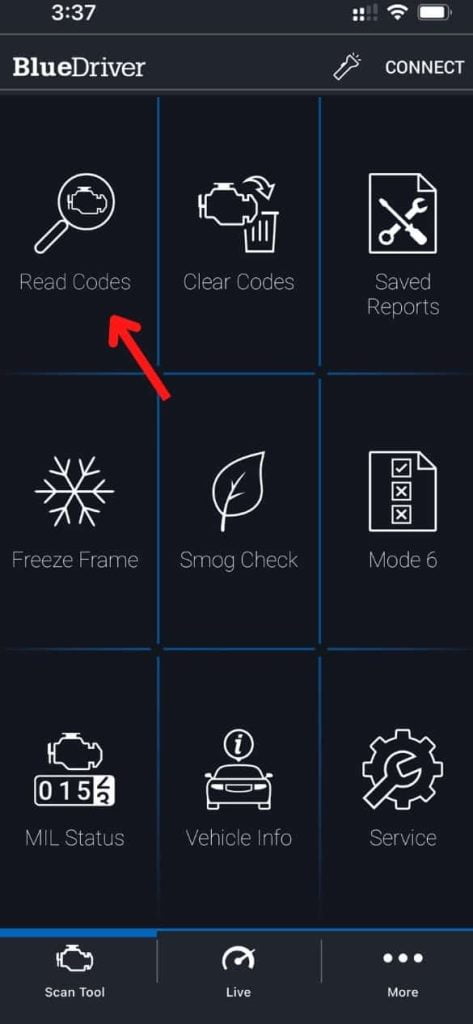
Inside the BlueDriver app, you’ll see the “Scan Tool” option on the bottom navigation. Now tap on the “Read Codes” option from the app dashboard.
Follow on-screen instructions and wait for two minutes until BlueDriver scans all the car sensors with the help of ECU and gives you a result.
Step #7: Read DTC Codes

BlueDriver will scan your car’s sensors and provide you with error codes. You can tap any error code to see the full details and possible repairs.
Step #8: Clear Codes

BlueDriver interacts with your ECU and sends the instructions to clear the OBD2 codes that trigger Malfunction Indicator Lamp (MIL). Tap on the “Scan Tool” option and select Clear Codes to delete all trouble codes on your vehicle.
How To Read Real-Time Data with BlueDriver Scanner?
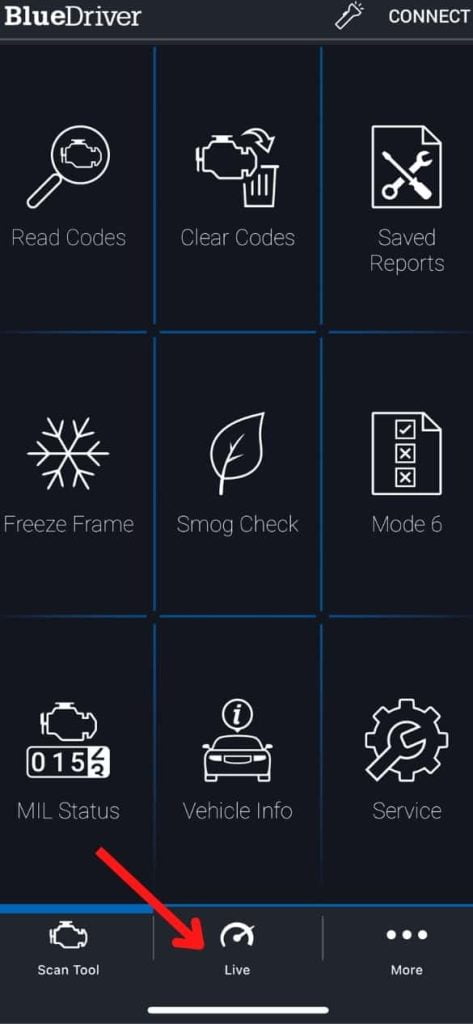
Although BlueDriver is not a bi-directional OBD scanner, it provides many features. You can read the Live Data of your car or truck with the help of the BlueDriver sensor.
Follow the above steps to connect the BlueDriver OBD2 scanner with your car ECU and smartphone. Once the scanner is connected, follow these steps to read live data:
- Launch BlueDriver App on your phone or tablet.
- Tap on the “Live” option located at the bottom navigation bar.
- Start your car engine and read all the live data.
How To Do Smog Check with BlueDriver OBD2 Scanner?

BlueDriver is one of the best Bluetooth wireless OBD2 sensors that provide a Smog Check option.
You can read data from exhaust gas sensor, PM filter, NMHC catalyst, oxygen sensor, etc., with the BlueDriver scan tool.
Before going for Smog Readiness Test, you can ensure that your car is ready for Smog Check or not.
Follow these steps to perform Smog Check with BlueDriver:
- Connect your BlueDriver with your Car and Phone. (Read the above steps)
- Launch BlueDriver App on your phone or tablet.
- Tap on the “Scan Tool” option and clear all OBD2 codes.
- Now go back and tap on the “Smog Check” option.
- Wait for a few minutes, and BlueDriver will tell you whether your vehicle is ready for Smog Check.
Conclusion – BlueDriver Pro Bluetooth OBDII Scan Tool
BlueDriver is a great tool to scan your vehicle’s health. It offers many diagnostics like Smog Check, Live Data, Clear Codes, Freeze Frame, etc.
I’ve explained- how to use the BlueDriver OBD2 scanner to detect trouble codes, clear codes, and Smog check.
I hope you found this tutorial helpful. Share your feedback in the comment box.


